Drafting
Introduction
In 1973 my wife and I moved to Ste Anne de Bellevue on Montreal’s West Island where I was a newly appointed facility member in John Abbott College’s Physics Department. This move created many changes in our lives, one of which involved the long drive from Montreal to Parrsboro, Cumberland County, Nova Scotia when the college closed for summer vacation and Christmas vacation. The Parrsboro area was where our parents lived, where we were born and where we grew up. For accommodation at Christmas we alternated between my parents and my wife’s parents; this meant two Christmas dinners as neither set of parents would agree to a joint Christmas gathering. During the summer we lived in a small travel trailer we bought second-hand in Montreal and brought to Parrsboro. This was great because the trailer could be set up in a parent’s dooryard or on one of several beaches on the Parrsboro Shore. During the winter months the trailer was stored in my father’s large barn.
When my father died in 1979 it became obvious that in order to come to Nova Scotia year after year and stay for significant lengths of time we would have to have a place of our own. We quickly learned that buying an existing house was out of the question but building a small cottage, mostly by myself, was a possibility if I took advantage of a number of opportunities that were available to me. What follows is a description of colonial architectural style we chose to build a cottage and the opportunities that allowed me to do the construction work.
My building a cottage by myself with occasional help from my father in law and friends was certainly possible. I had building experience gained while working with my father in his construction business and I inherited much of his equipment for building and raising houses, barns and other built objects. As well, I had inherited from my father one half of his 28 acre timber lot, called the Sugar Woods, located approximately five miles north of Port Greville on a grant of land originally granted to Dr. Nathaniel Bullen.
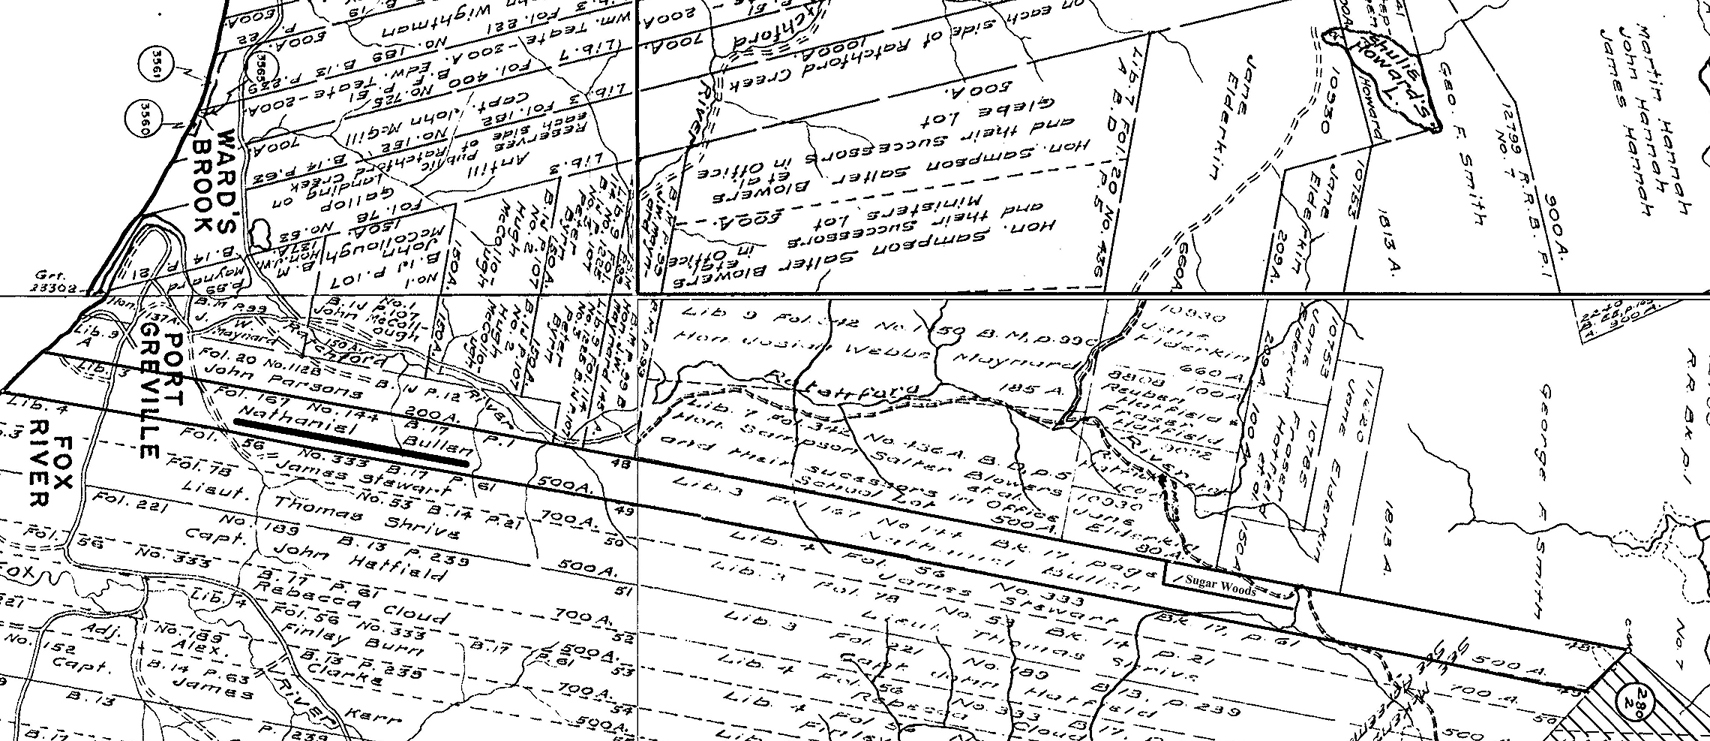
Fig. 1: A section of the Parrsborough Township Land Grant Map showing the location of the Dr. Nathaniel Bullen grant as well as the location of the Sugar Woods.
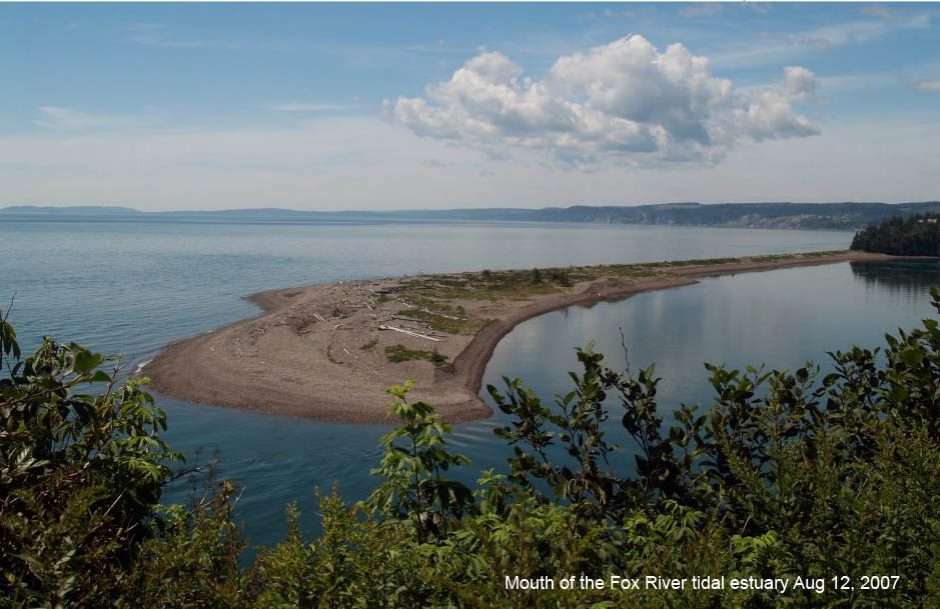
Several years before our decision to build we bought two acres of land in a small coastal community called West Apple River. So, we had a place to build and timber land that could supply logs for sawing into lumber to be used for constructing buildings; if we could get the tall straight trees cut and hauled to a sawmill. Thanks to my father in law and a few friends I was able to get these lumber jobs done.
The Discovery of an interesting historical architectural style
Choosing an architectural style to build was now the important remaining task was. After moving to Montreal my wife and I often made trips to New England. On some of these visits we would drive by an asymmetrical Colonial house style known as a
Saltbox House (See Fig.2). I was fascinated by this architectural style with its short roof in front, a much longer roof in back and a large central chimney. This construction arrangement creates two stories for the front of the house and one single story for the back of the building.

Fig.2: A sketch of the exterior of a large Colonial Saltbox House. Note the central chimney on the roof. This chimney and the fireplace to which it is attached formed a large masonry structure that created a sizable thermal mass. The Colonial Saltbox Houses took advantage of heat energy stored in this thermal object by clustering rooms around it (See Fig:3).

Fig.3: The top drawing is a vertical section through the chimney/fireplace structure. The bottom drawing is a plan of the ground floor and the horizontal cross-section of the fireplace complex as well as the cluster of rooms around the fireplace.
The Name Saltbox and other stories
The salt we use today comes in a box purchased from a grocery store. It is so finely ground that it can easily be poured into a so called salt-shaker. At onetime however, salt used in the homes of Northern Europe and Colonial North America was in lumps that needed to be kept dry in a wooden box placed close to the fireplace where the cooking was done. When salt was needed for cooking and for sprinkling on food a few dry lumps would be placed in a mortar and pounded with a pestle until free-flowing grains were created.
Fig. 4 is a drawing modeled on a common type of a historic “salt box” hung by the fireplace.
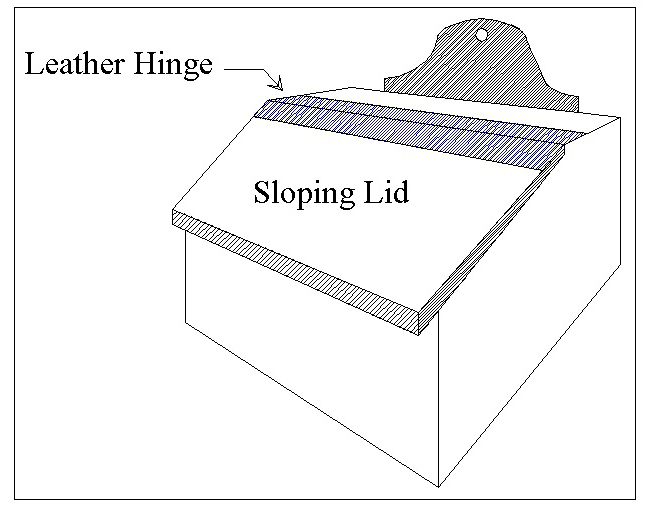
Fig. 4: A sketch of a so-called Hanging Salt Box. The drawing is based on a real box used to store rock salt and the box was hung on the kitchen wall close to where the cooking was done.
Supposedly,the long sloping roof on a saltbox house made East Coast settlers think of the lid on the Colonial salt box hanging on the wall by the kitchen fireplace.Whatever the case a name for this architectural style was born.
There are two other folklore stories associated with the Colonial salt box; “Queen Anne’s taxation of houses with more than one story” and “the added lean-to addition”.
During the reigned of Queen Anne,March8, 1702 to May 1 ,1 1707,the tax on Colonial New England houses was based on the number of stories. Since only the front of a saltbox house had two stories it was judged for taxation purposes to be a one story dwelling. So, was a saltbox house built to take advantage of Queen Anne’s taxation law?
As well, were lean-to additions added to the back of non saltbox houses for the same reason?
Since many Saltbox houses predate the reign of Queen Anne it is possible that the saltbox architectural style was developed because of the need for additional space for growing families and adding a lean-to to the back of a regular house was simply an economical way to enlarge a house.
My design
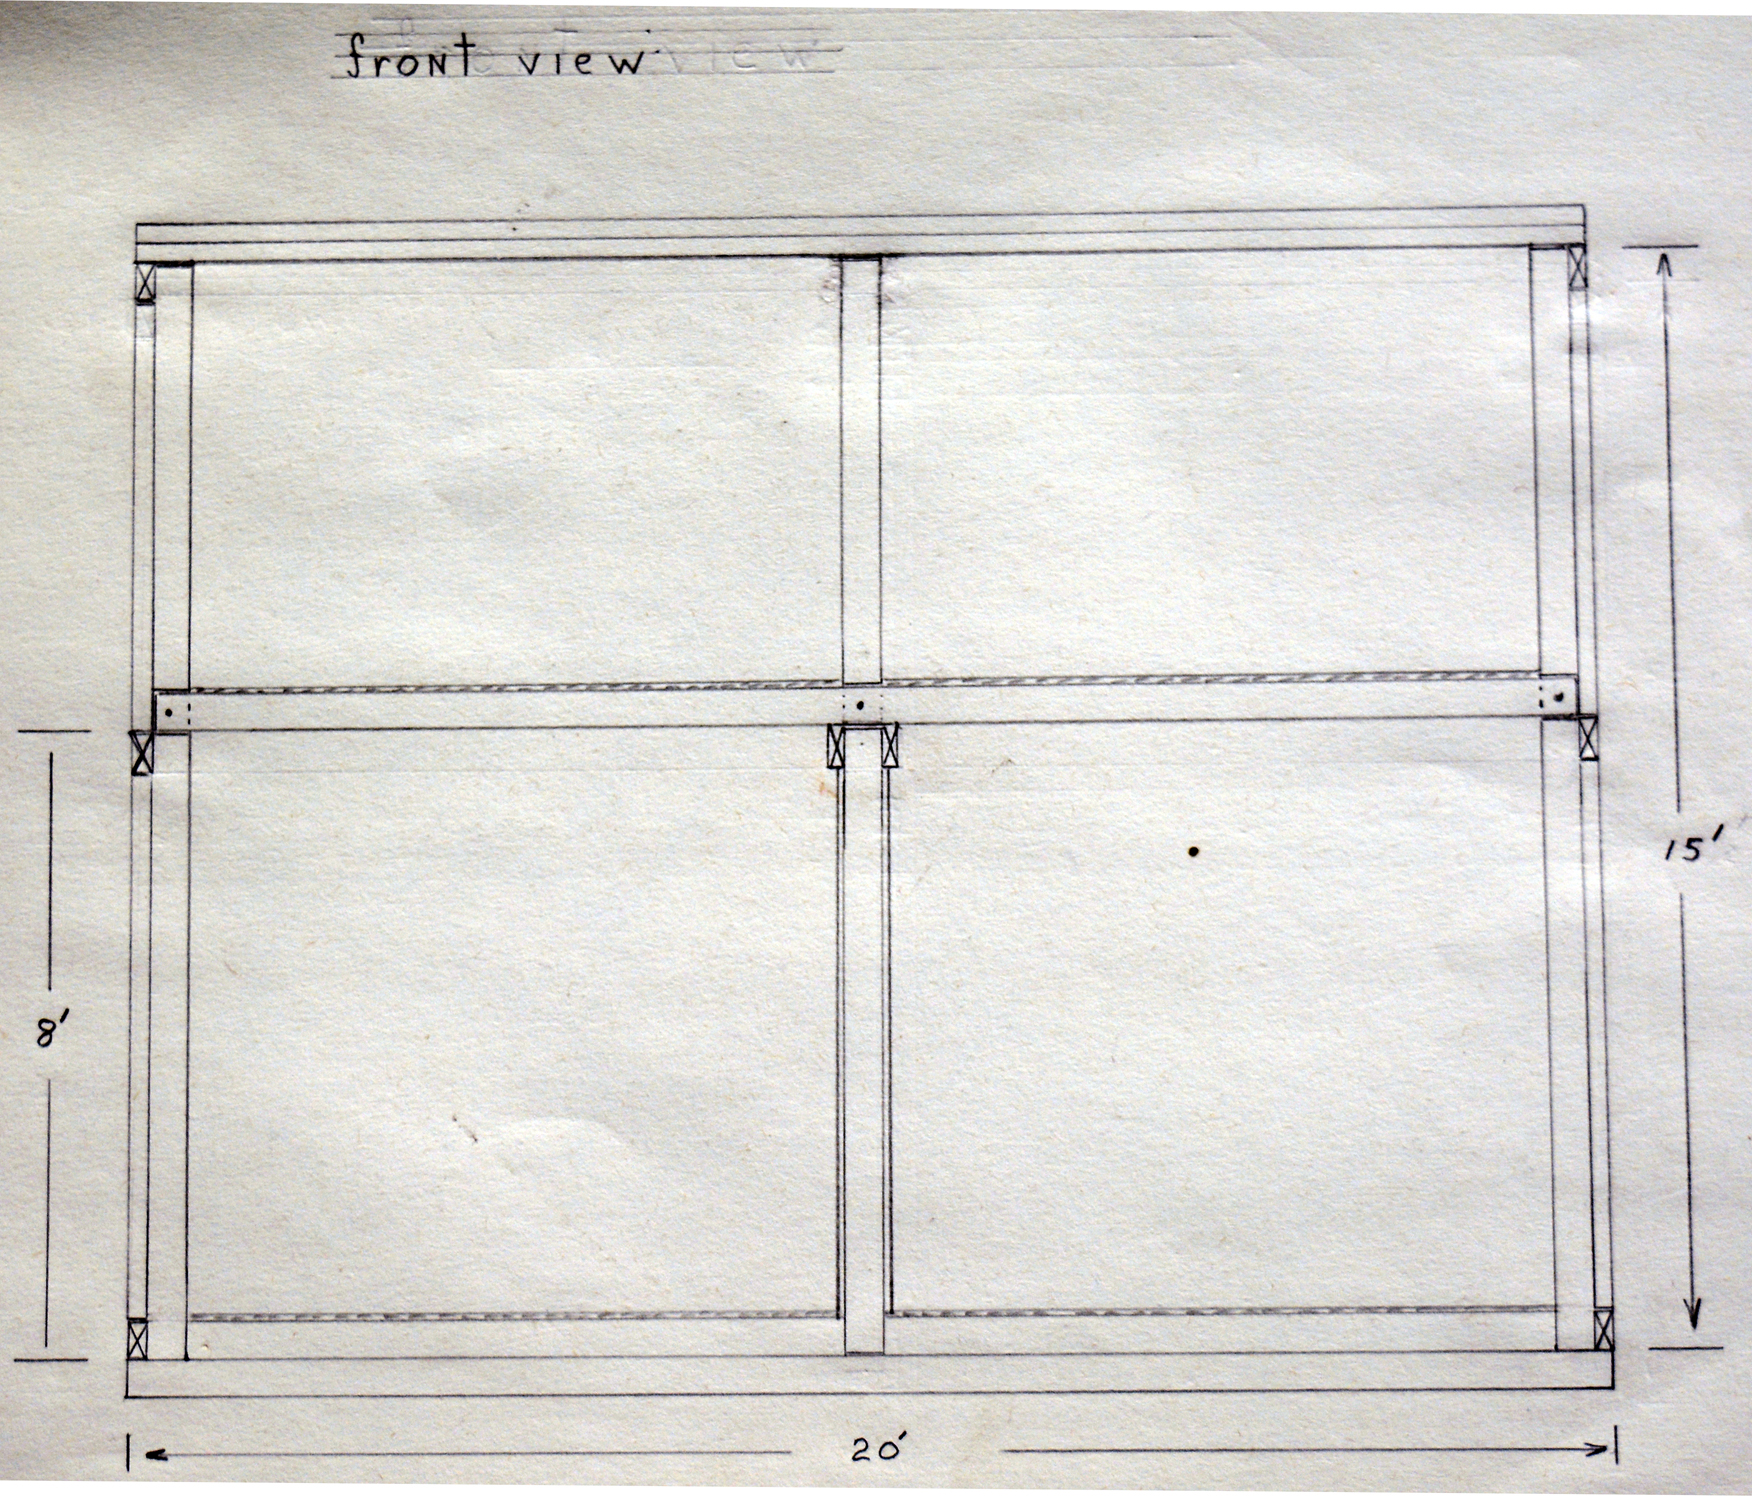
For practical reasons we decided to construct a Saltbox cottage having a 20 foot by 20 foot “first floor plan” as shown in Fig.5. This small size is challenging to design because aiming for suitable headroom can make the building rather height.

Fig.5: A Plan View showing of the locations of posts used for the cottage’s post and beam framework. The posts are secured to wooden base that forms a foundation deck that defines the first flood . The doors and windows as well other interior structures are not indicated because initially I did not know where to place them. Fig. 6a and Fig. 6b show the deck that will support the cottage’s post and beam framework and Fig.6c shows the posts being attached to the deck. Fig.5 represents the first phase in the design process. The next phase involves designing the framework for the building’s superstructure.
 Fig.6a:In this 1983 photograph 3″ by 6″ timbers are being set in place on cut stones to form the base of the cottage. The cut stones are from an old basement on our property and originally these stones had been extracted from a sandstone quarry that once operated, in West Apple River. The April 20, 1871 edition of the Chignecto Post reported that reported that a Sandstone quarry will open in Apple River. |
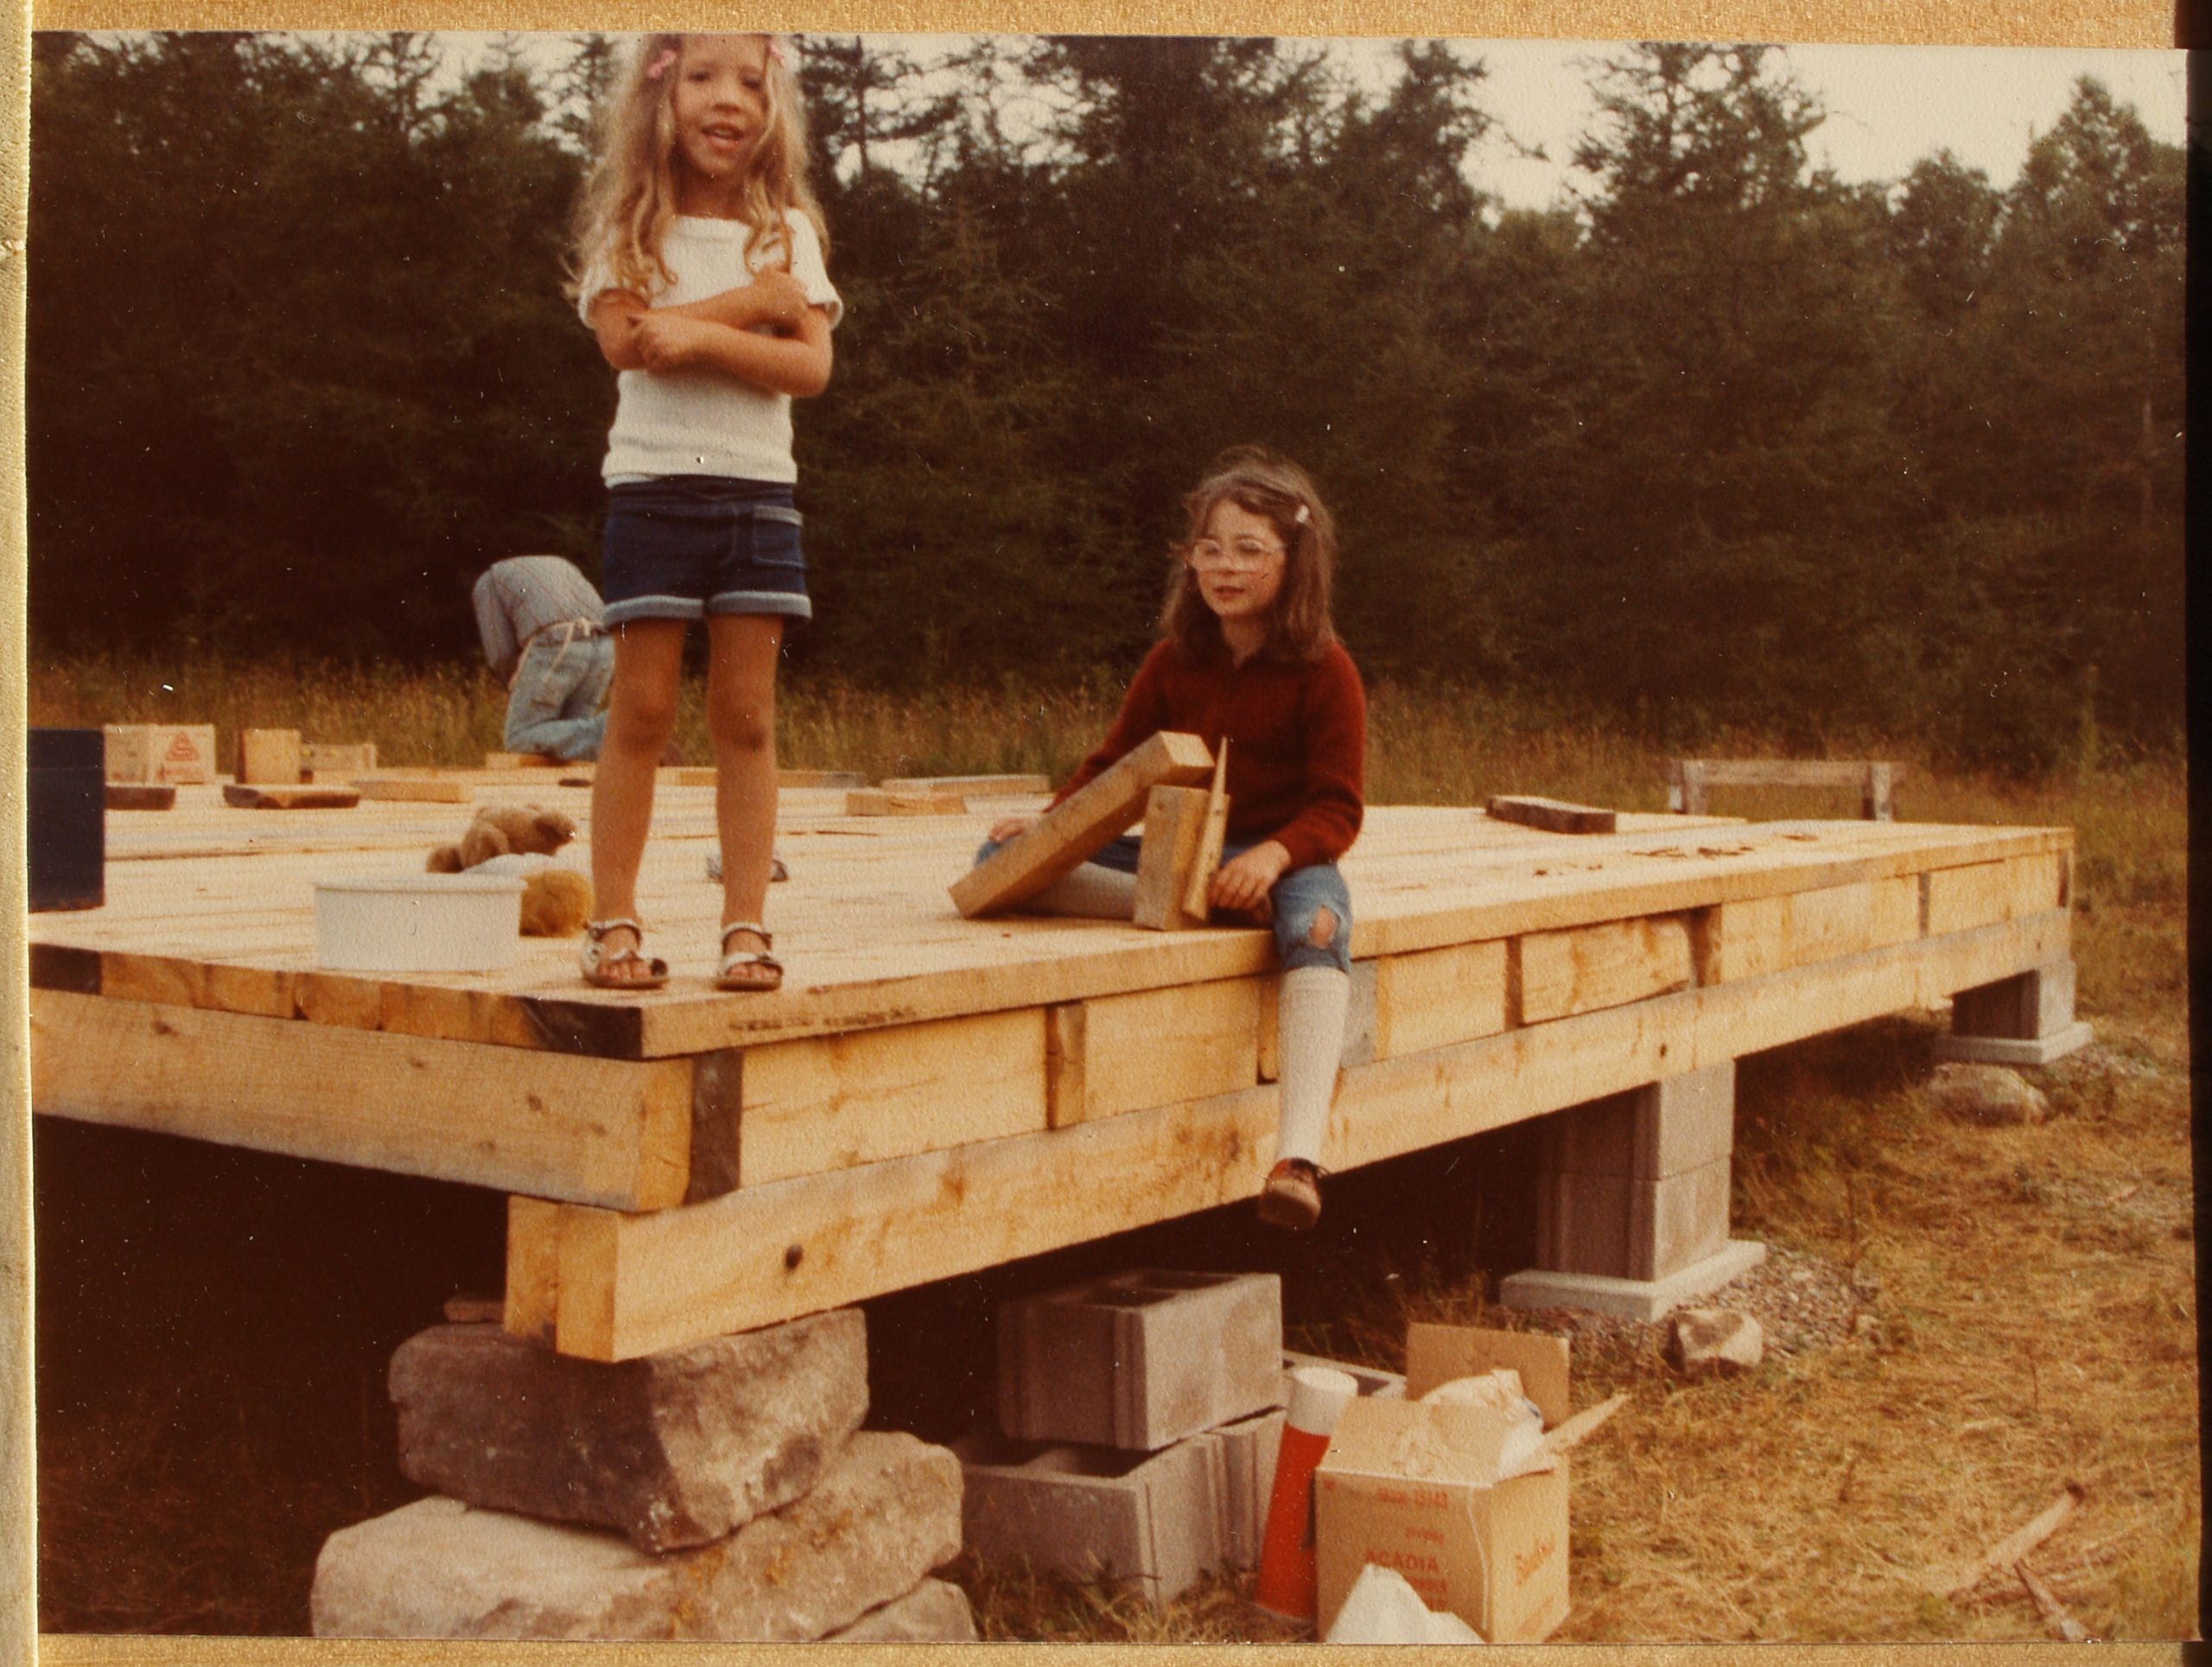 Fig.6b: This 1983 photograph shows the deck that will form the base of the cottage; it is nearing completion. |
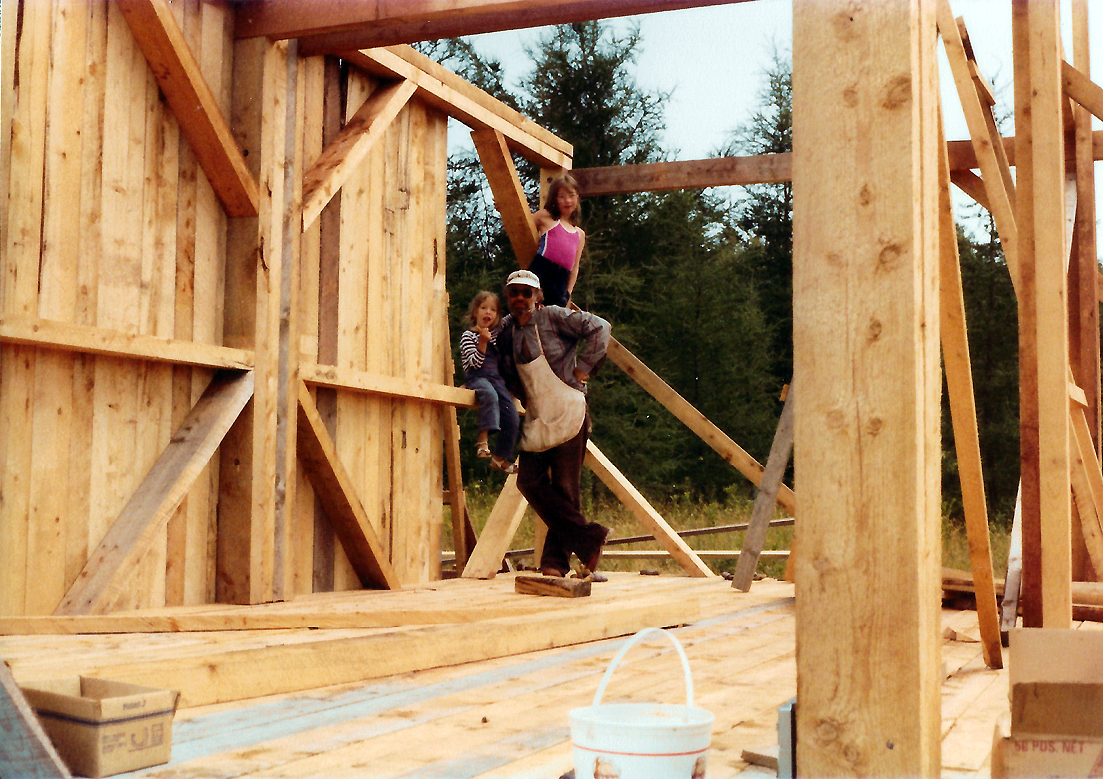
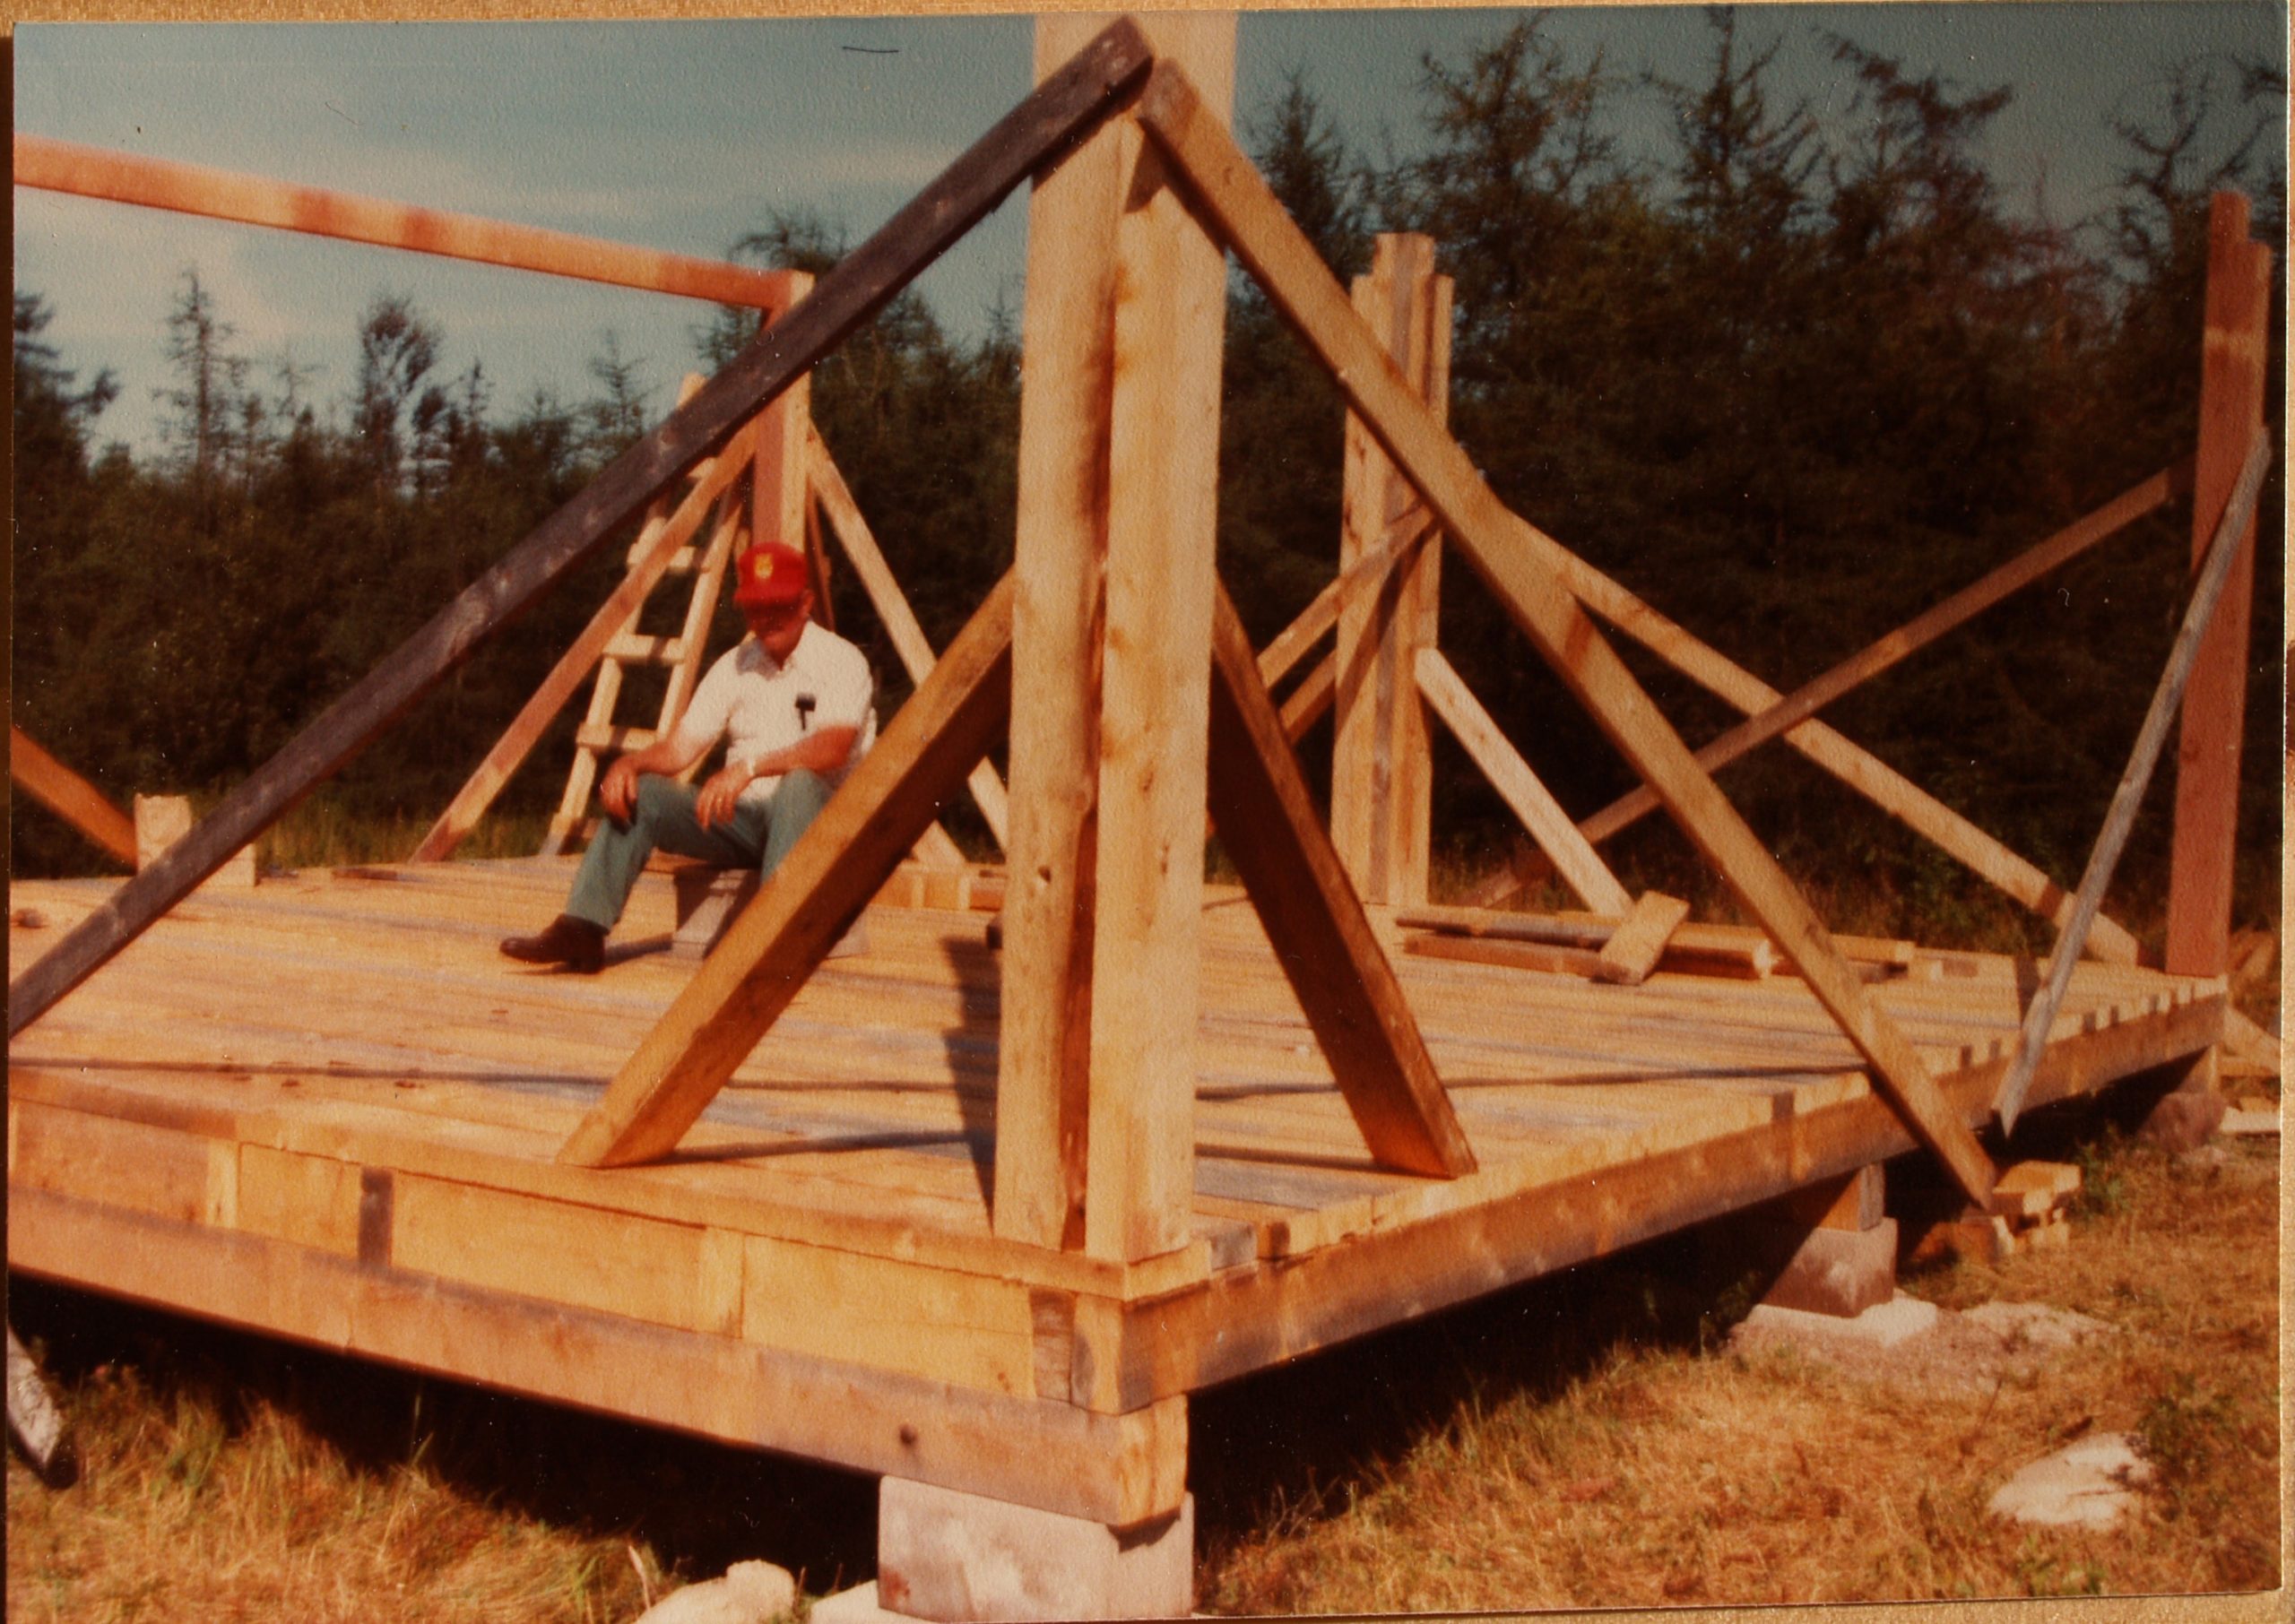 Fig.6c: Photograph 1983. The corner posts are in place and braced. |
I was interested in using 6 inch by 6 inch square timbers to construct a post and beam framework for the cottage’s superstructure. However, I knew that making the mortise and tenon joints that such large posts and beams require would probably be time consuming. So, as a compromise I used 3 inch thick by 6 inch wide pieces bolted together as indicated in the following drawings. As well, while assembling the framework I could handle each 3 by 6 inch timber by myself. The other pieces of lumber I used consisted of one inch thick boards and two inch thick planks.
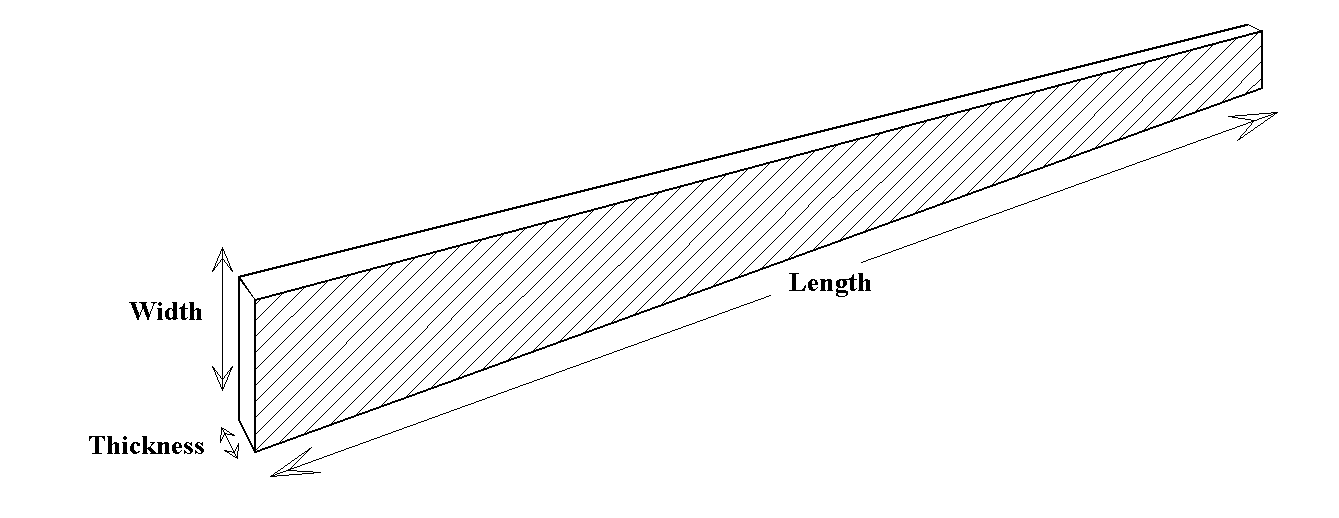 Fig.7a: A thin rectangular piece of lumber. In my day, if the thickness was one inch the piece was called a board. If the thickness was two inches the stick was called a plank. |
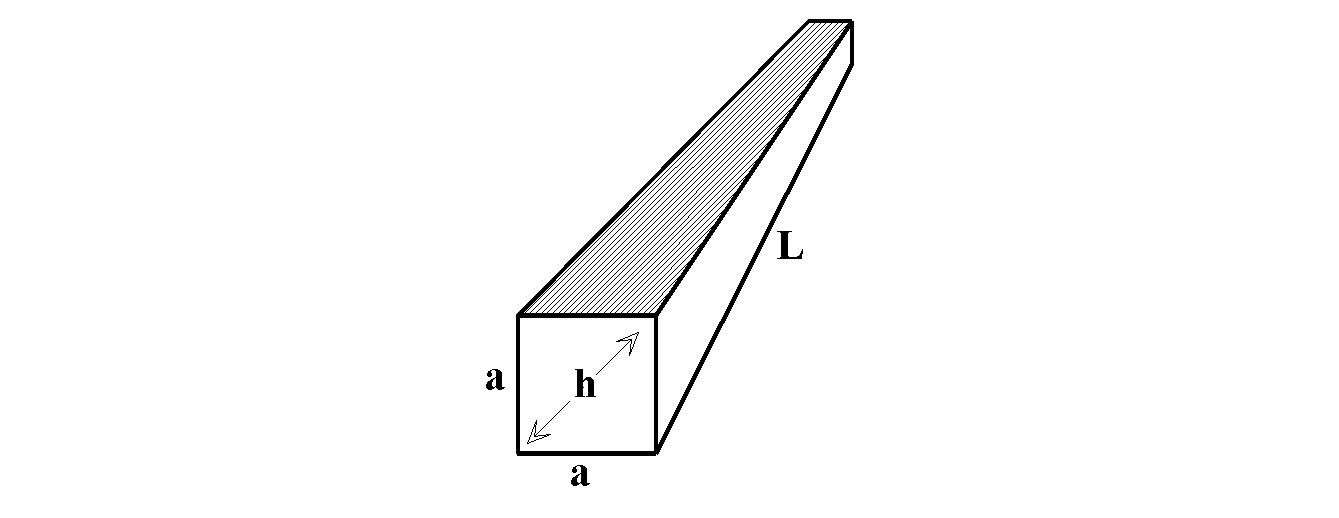 Fig.7b: Rectangular Timber with a square cross-section |
The Dawings
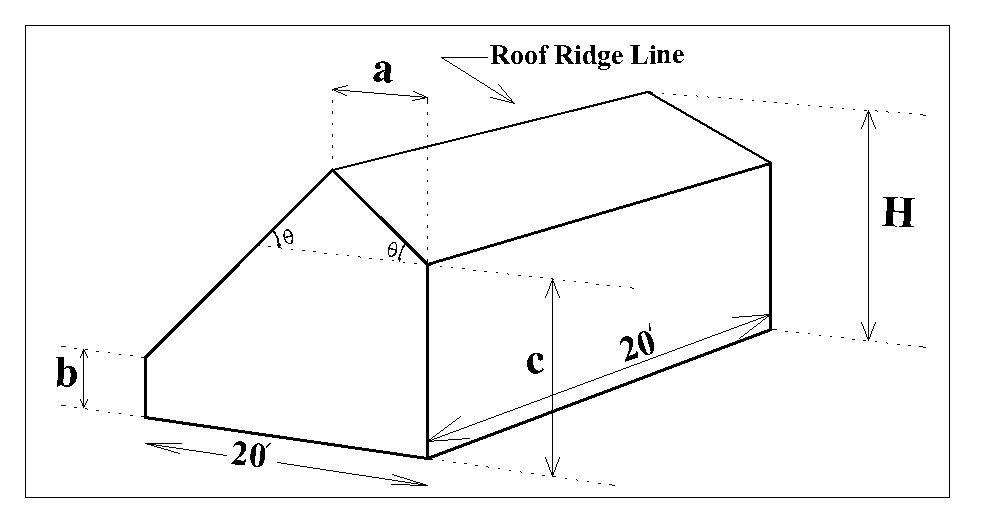
Fig.8: This drawing shows the lengths a, b, c and H as well as the angles theta θ. A process must now be devised to determine values for these structural quantities that can be used to draw a post and beam framework for the cottage that is suitable for building.
Choosing values for the structural quantities shown in Fig.8 requires careful thought. If, for example, one is not careful the height of the back post “b” will not be sufficiently high for head room on stairs that might start at the back wall, connect to a landing and then turn ninety degrees and connect to a catwalk on the the second story floor as shown in Fig.9
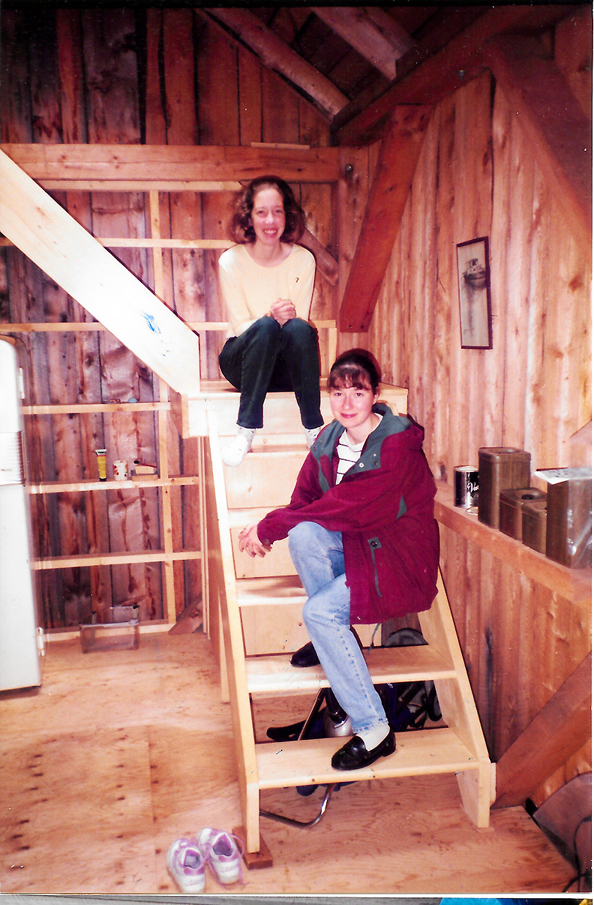
Fig.9: Stairs to the second floor.
Also how high, represented by “a” in Fig.8, should the roof ridge be placed? In fact “H”, the vertical height of the roof ridge above the ground, will require a two story staging at the front of the cottage when it comes time to shingle the roof. So, I tried to keep the height “H” as small as possible.Fig.10 a shows several possibilities I considered. Fig. 10 b, as well as Fig. 10 c show the dimensions I finally selected.
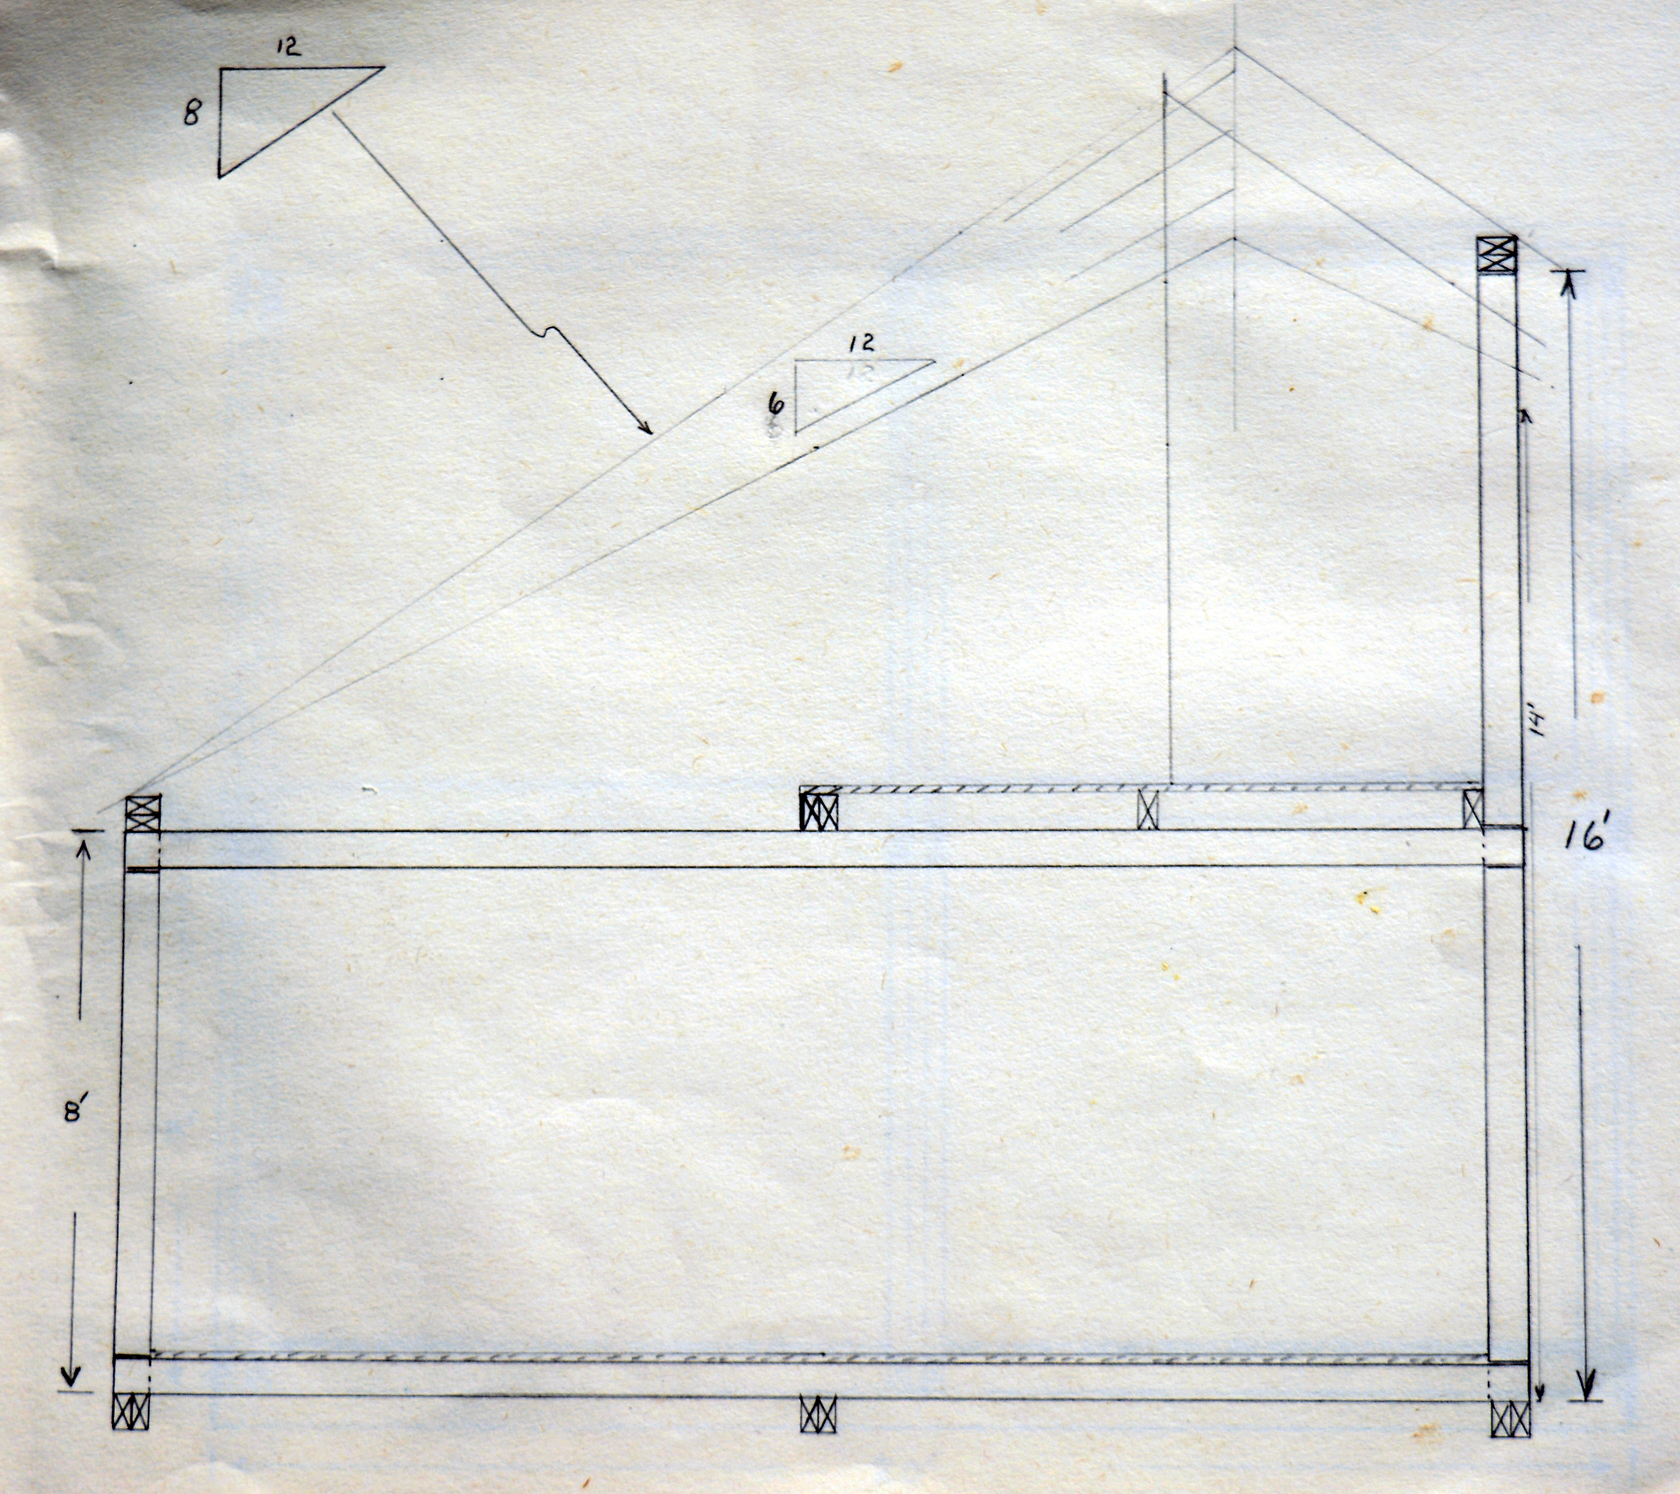 Fig.10 a Side View: Design considerations for roof pitch and height of corner posts |
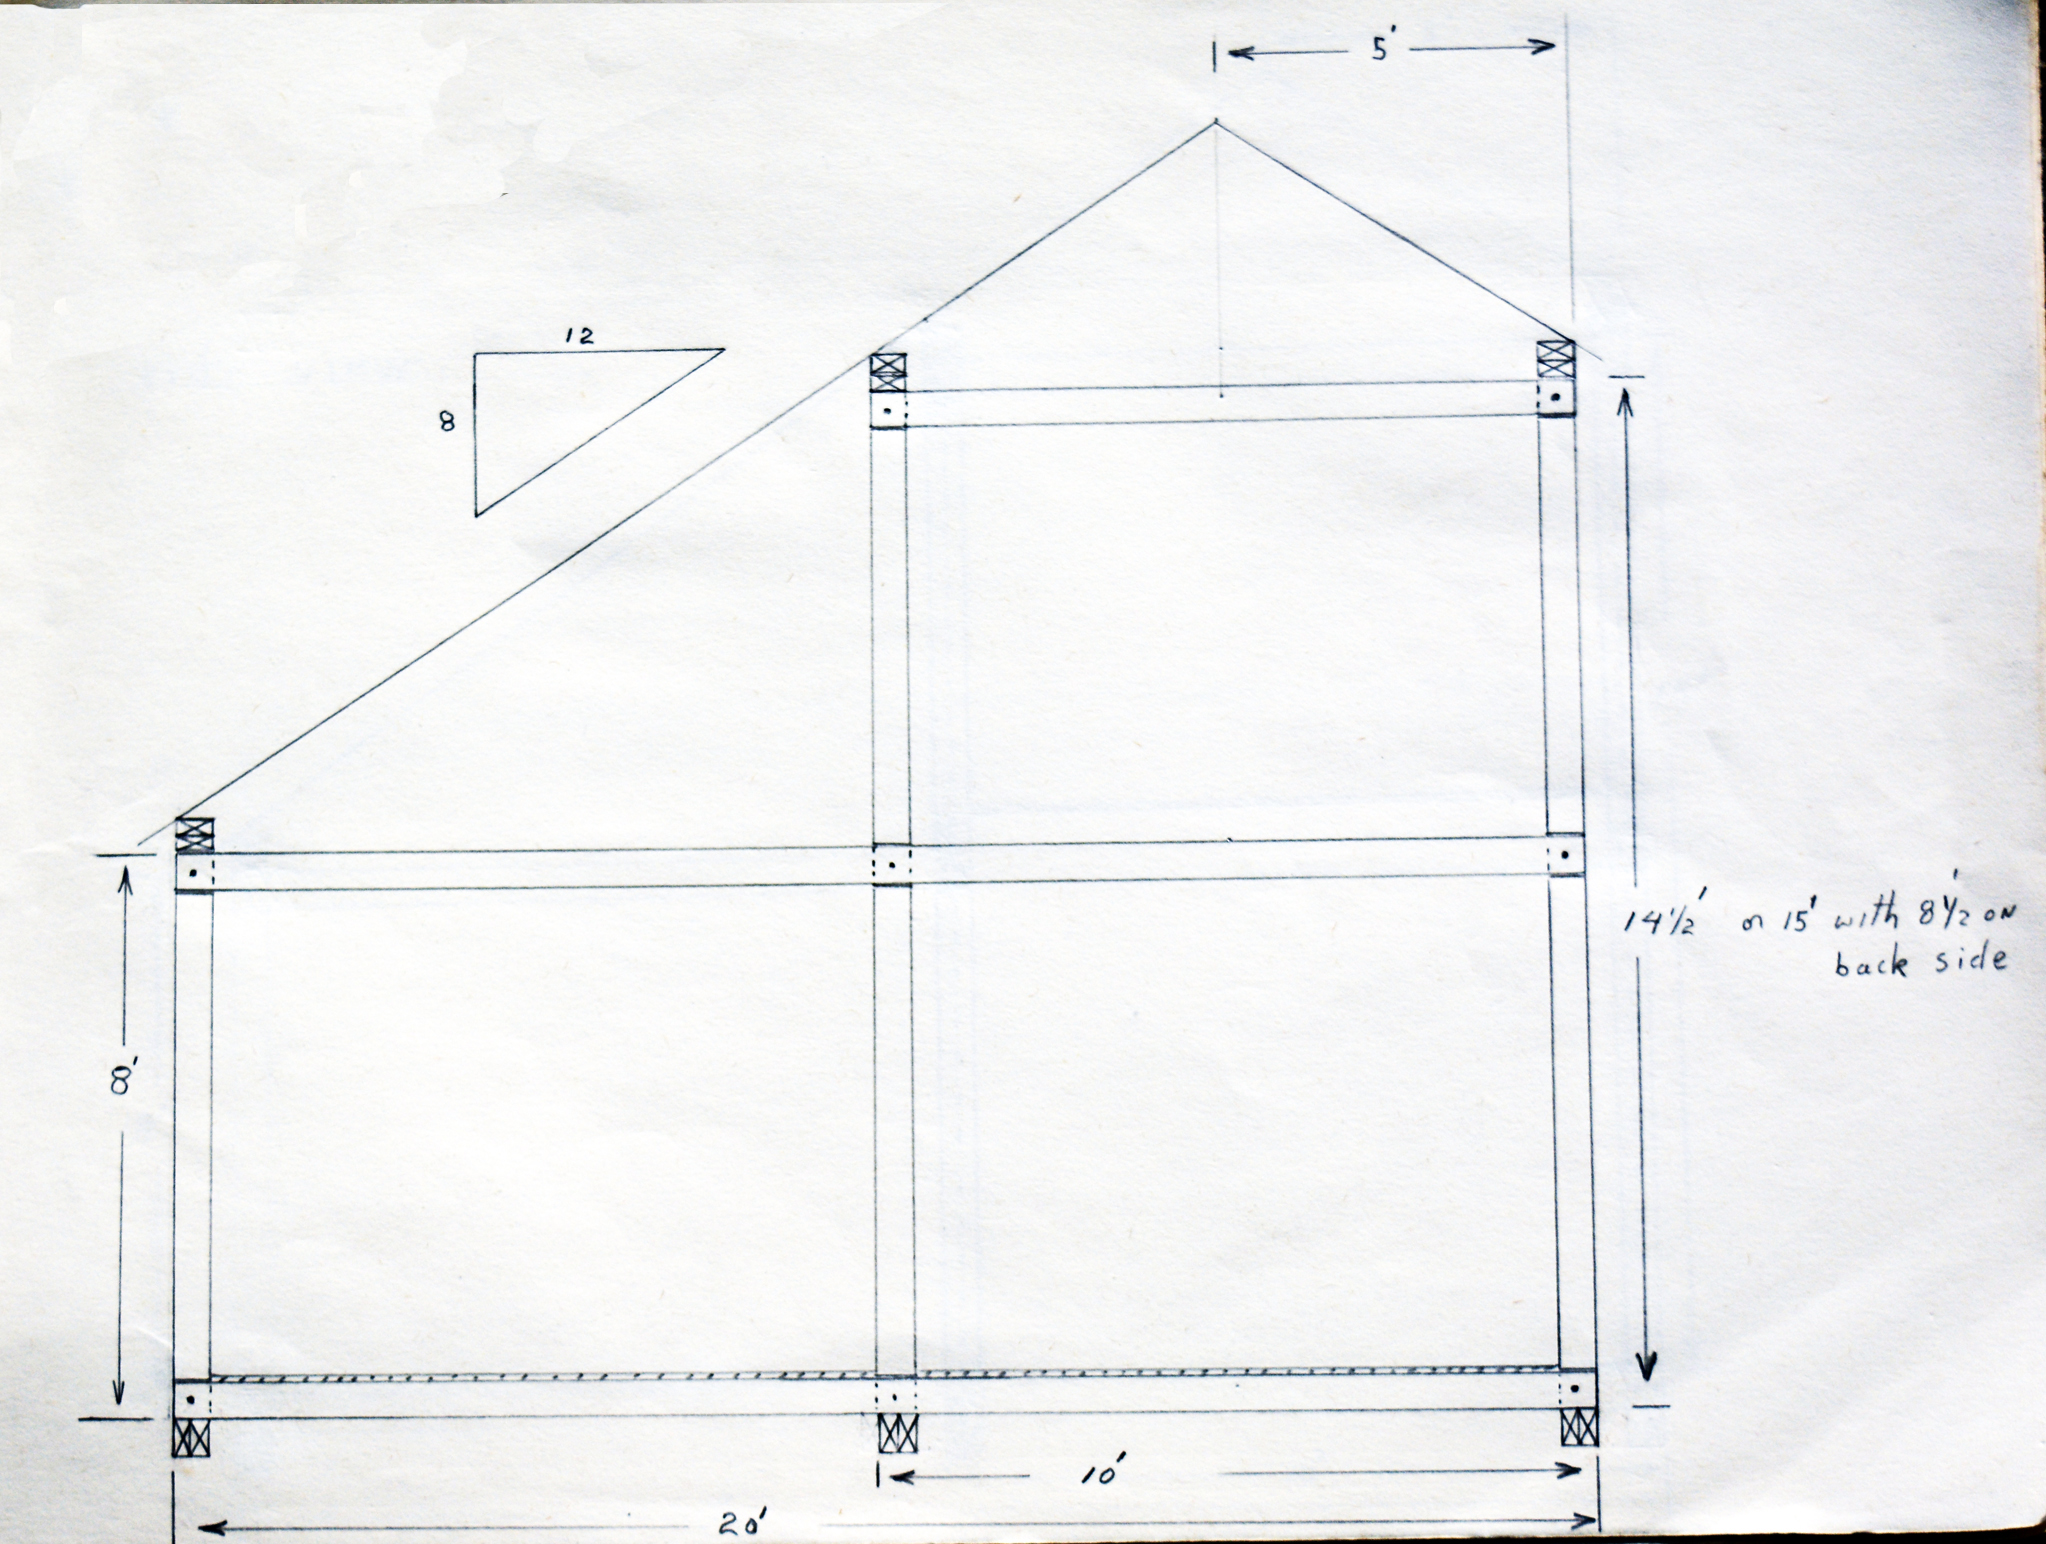 Fig.10 b Side View: Decisions made for the pitch of the roof and the height of the corner posts |
|
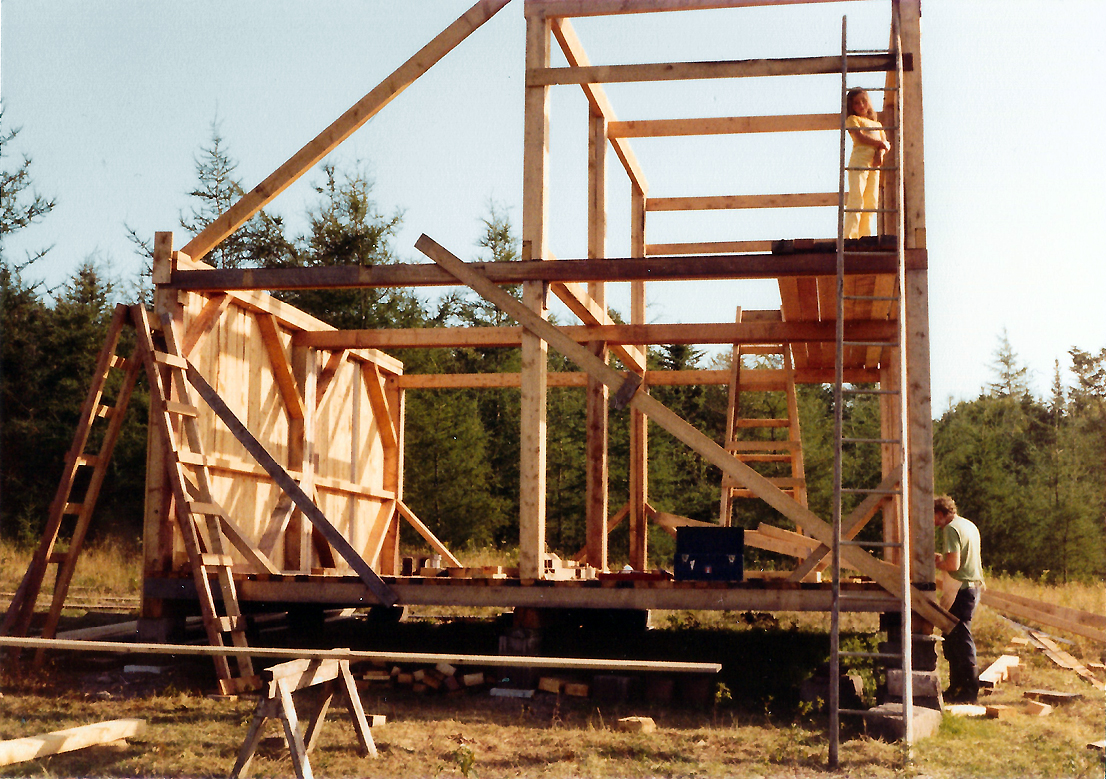
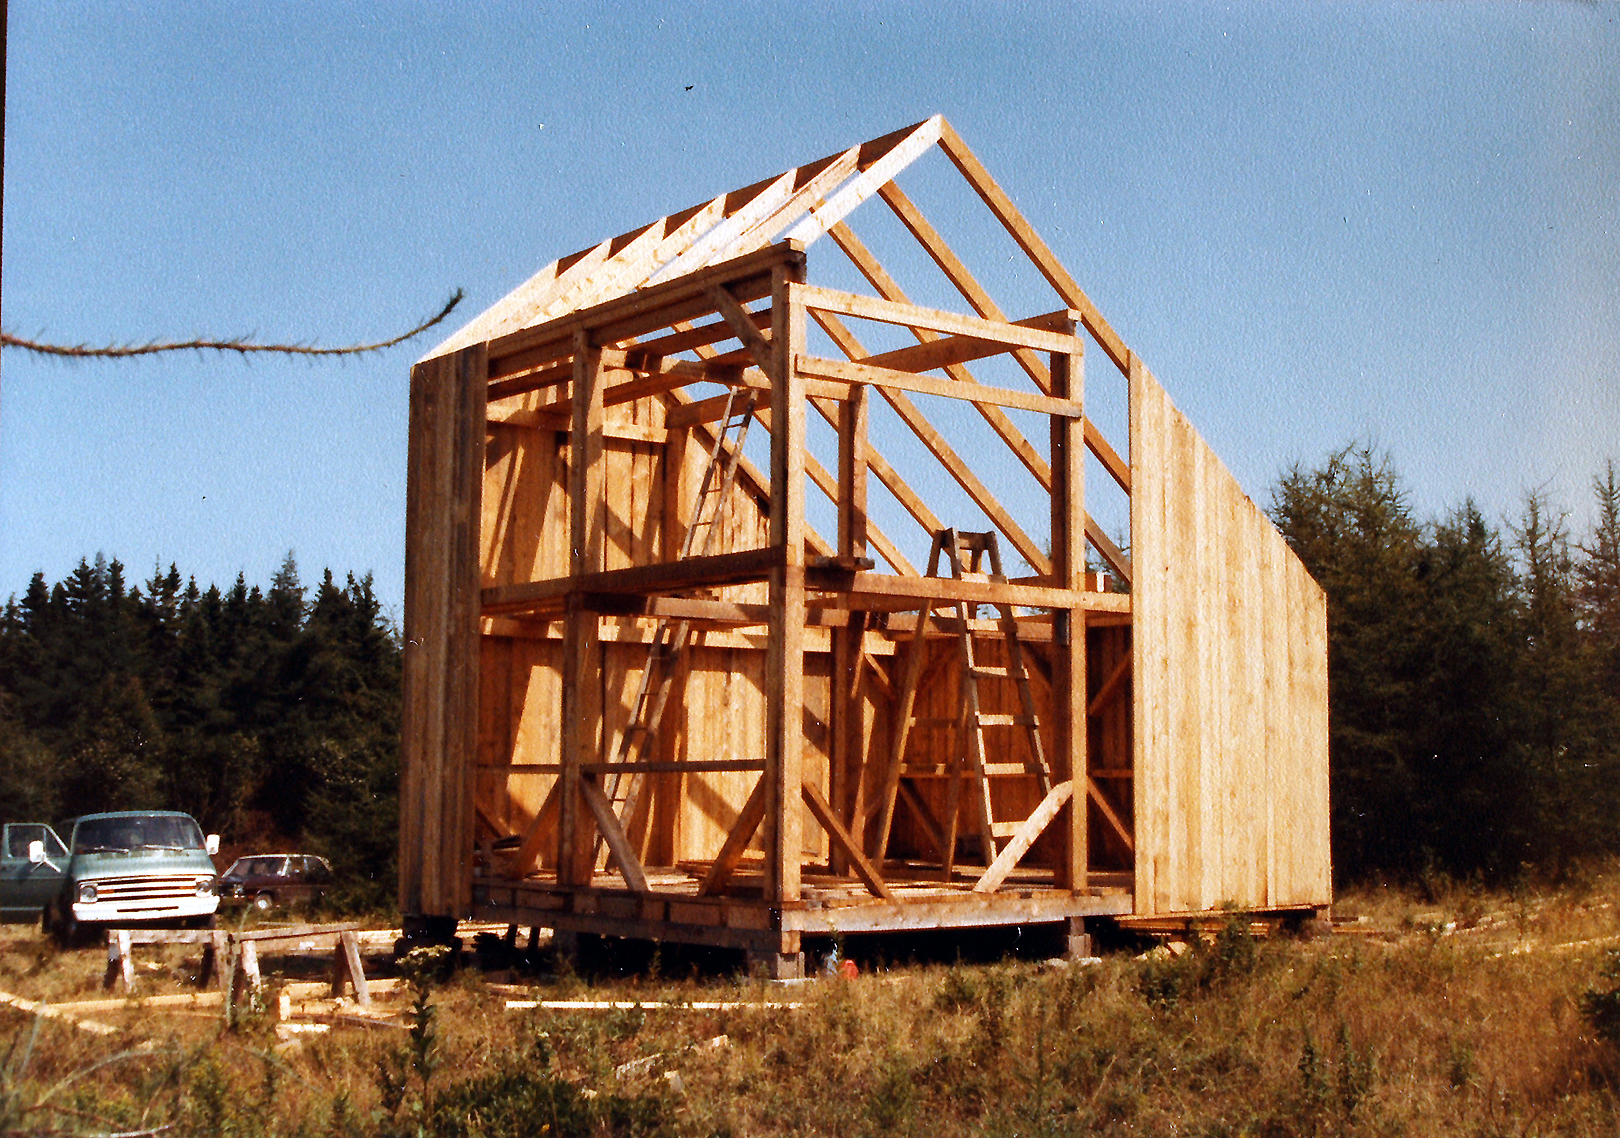
The dimensions marked on drawings Fig. 10 b and Fig. 10 c were used to construct the post and beam framework . Photographs of the construction process for this skeleton building structure are given below.
 jvvcg |
 ngde |
 eeslp |